Machine-readable: manifest · index · English Markdown
Draft translation: this English page is available for review and is not yet the production default.
Run a localization test in Space Studio
Use Space Studio to validate a ready map with representative camera images before integrating the localization API into an application. The test runs the same production localization service and visualizes each returned pose directly against the map.
Recommended workflow: Test several locations, viewing directions, lighting conditions, and devices. One successful image proves only that single observation—not the full coverage of the space.
Before you start
You need:
- A 01Spatial Portal account with access to the target map.
- A map whose status is Ready.
- Sharp JPG or PNG query images captured inside the mapped area.
- The camera intrinsics for the exact uploaded pixels:
fx,fy,cx, andcy.
If an image was resized or cropped, adjust its intrinsics before running the test. Estimated intrinsics can be useful for an initial check, but production validation should use values reported by the camera API or a calibration.
1. Open the map in Space Studio
- Open Spatial Maps in Portal.
- Find the ready map you want to validate.
- Select Open on the map card.
Space Studio opens in a new tab and loads the map point cloud and mapping camera poses.
2. Switch to Localization
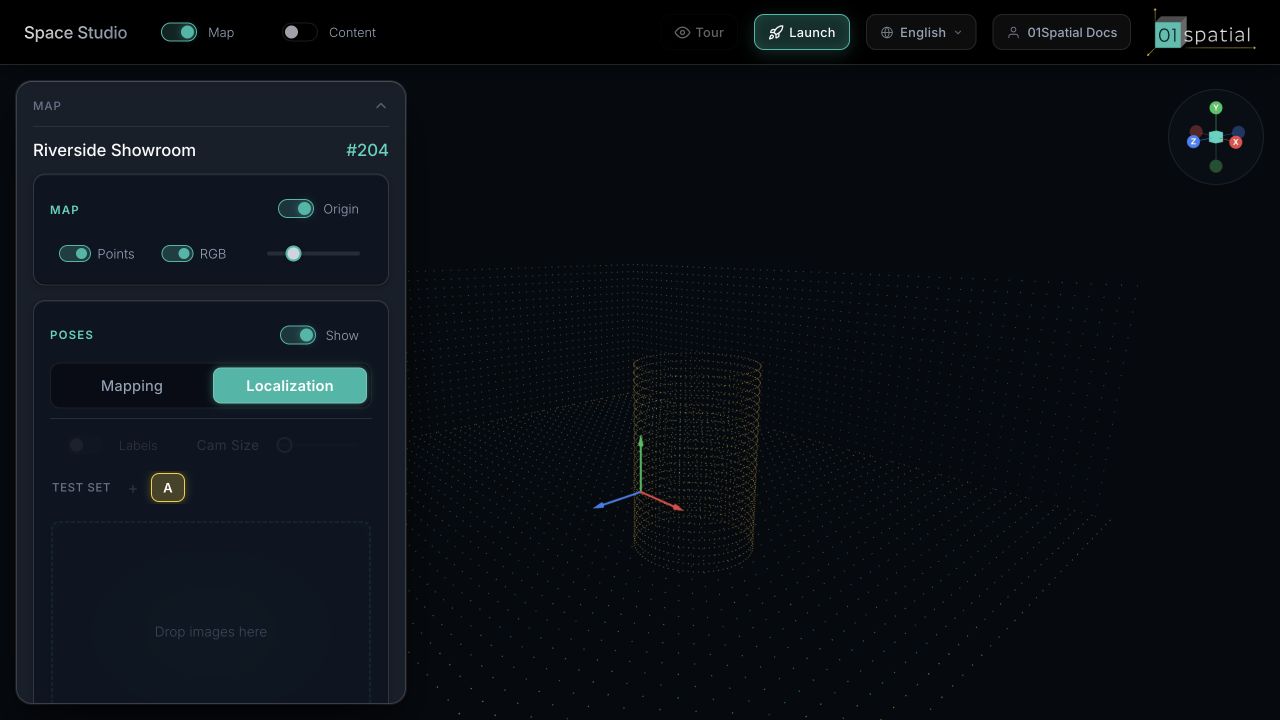
In the left POSES panel, switch from Mapping to Localization. Mapping mode shows the cameras used to build the map; Localization mode creates independent test sets for query images.
If Localization is unavailable, confirm that the map is ready and has completed its localization assets.
3. Add representative images
Drag JPG or PNG files into the localization test area, or select them with the file picker. You can load multiple images and compare several test sets in the same 3D view.
Choose images that answer real deployment questions:
- Does the entrance localize from the direction a visitor approaches?
- Do repeated corridors or blank walls provide enough visual evidence?
- Does a night-time or low-light image work against a daytime map?
- Do the devices planned for production behave consistently?
4. Enter camera intrinsics
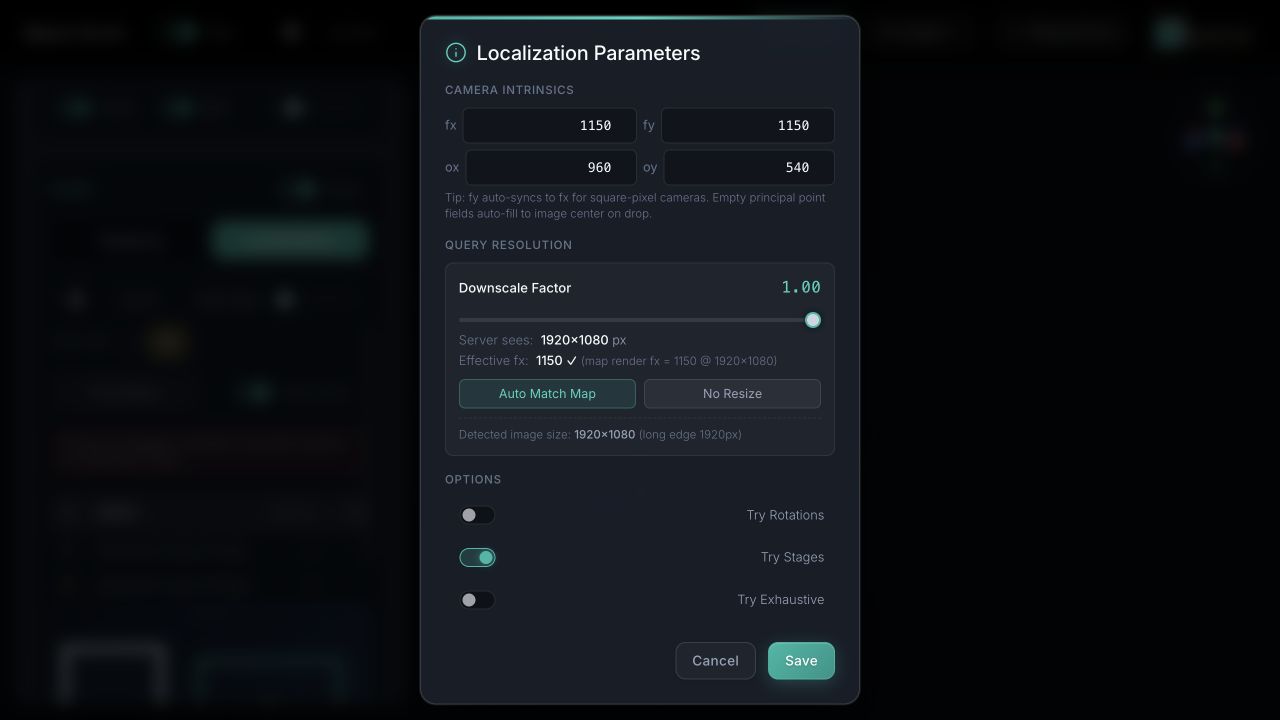
Open Parameters and enter the intrinsics for the uploaded image dimensions.
| Field | Meaning |
|---|---|
fx | Horizontal focal length in pixels |
fy | Vertical focal length in pixels |
cx / ox | Horizontal principal point in pixels |
cy / oy | Vertical principal point in pixels |
Enable rotation handling only when the encoded pixels may not use the expected orientation. Keep the default staged localization strategy for normal validation unless support asks you to isolate a specific stage.
5. Run and inspect the results
Select Run. Space Studio processes the images in order and shows:
- A success or failure state for every image.
- The localized camera frustum in the 3D map.
- Matched inlier features over the selected image when available.
- Confidence and diagnostic metrics permitted for your account.
Portal shows the applicable credits or price before a batch runs. Each processed image follows the same account localization policy as an API query.
6. Decide whether the map is ready
A useful validation set covers the intended operating area rather than collecting many nearly identical images. Review failures in context:
- Confirm that the image belongs to the mapped area.
- Verify the intrinsics and encoded image orientation.
- Check for motion blur, extreme glare, occlusion, or featureless surfaces.
- Compare the failed view with nearby successful views in the 3D map.
- Capture a sharper or wider view before deciding that the map itself is incomplete.
After representative tests succeed, continue with Localization API & AR integration to connect a generic client.