Machine-readable: manifest · index · English Markdown
Scan a space with a 360° camera
01Spatial is not tied to a dedicated brand or model. Any 360° camera that can export a standard 2:1 equirectangular video through its vendor software can be used, including any Insta360 model, any GoPro MAX model, any RICOH THETA model, and cameras from other brands.
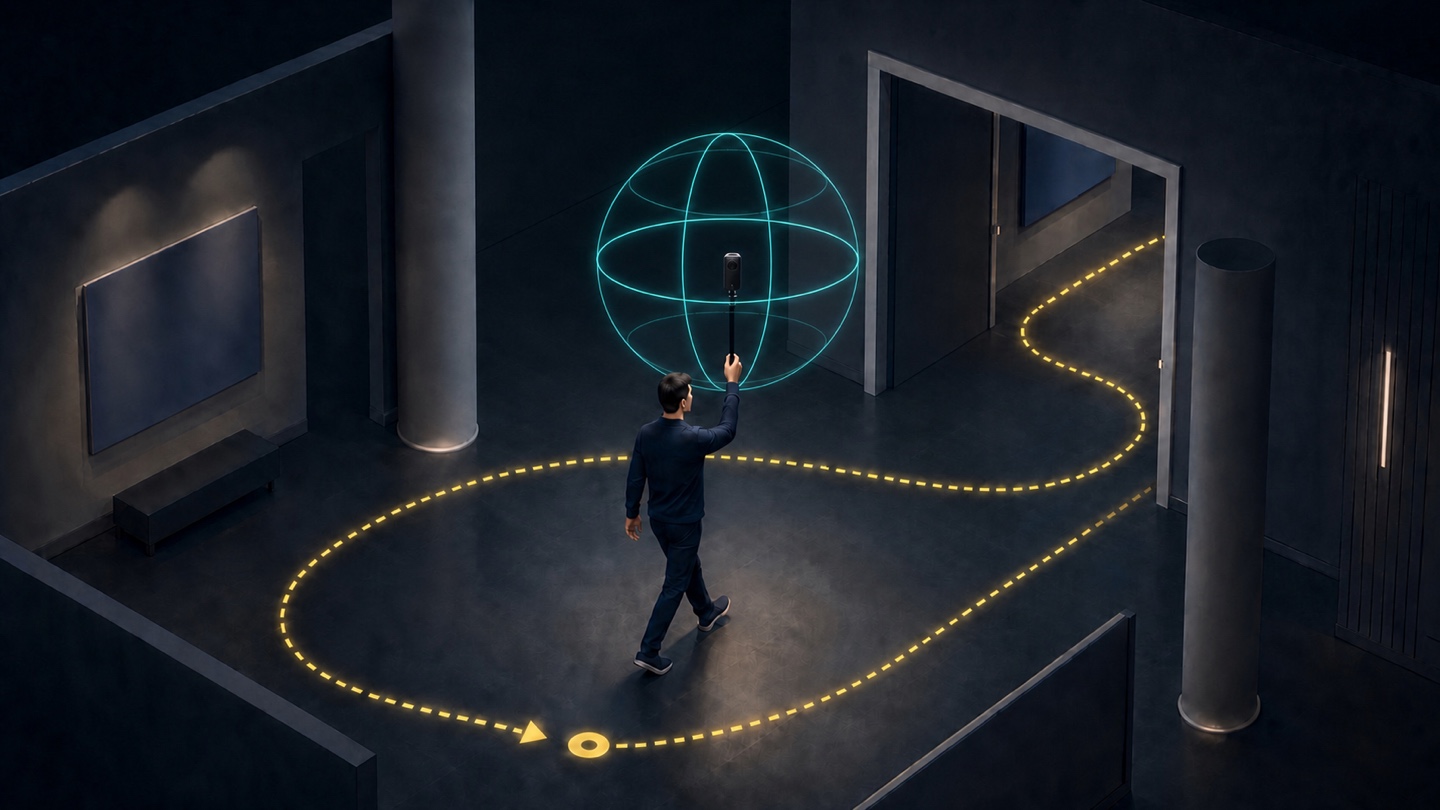
The final upload is one ZIP containing one fully stitched 2:1 panorama video (MP4 or MOV) exported by the camera vendor's software. Do not upload raw dual-fisheye footage or a proprietary camera format.
Define a successful scan first
A spatial scan is ready for mapping when all of the following are true:
- Fixed-object edges are sharp, without sustained motion blur, glare, or stitching ghosts.
- The route is continuous and adjacent positions share substantial wall, doorway, sign, or fixture detail.
- Every room or area contains a loop, and doors, corners, and floor transitions are revisited from another direction.
- One spatial-reference route—Reference Boards or Map Configurator—has been selected, with clear observations preserved for that route. GCP means Ground Control Point; despite the name, it does not have to be on the floor.
- The vendor software can export a fully stitched 2:1 panorama video.
Prepare the camera and site
Prefer 8K and remove every lens cover
- Prefer 8K or higher resolution. An 8K recording usually preserves more distant and fine static detail for mapping and later phone localization.
- Use 5.7K when it is the camera's highest available resolution, but move more slowly and provide ample light. Do not accept severe motion blur merely to keep a higher resolution; improve light, exposure, and walking speed first.
- Select 360° panorama video mode, use a stable 24, 25, or 30 fps, and choose the anti-flicker setting that matches the local power frequency.
- Lock exposure and white balance in stable light to avoid repeated brightness or color-temperature jumps between neighboring positions.
Remove every lens protector before scanning, including transparent protectors. Transparent covers introduce reflections, flare, blur, and additional stitching error. Clean both lenses before recording; do not remove the camera to wipe a lens during the scan. If cleaning becomes necessary, stop and begin a new scan.
Prepare storage, power, and the site
- Use a high-speed memory card, preferably V30/U3 or better. For large sites, prepare 256 GB or more.
- Confirm that power and free space can cover the entire route. For long scans, prefer a reliable external power source and verify that the camera will not stop from power loss or overheating.
- Do not change batteries, cards, or recording modes during a scan. After an unexpected stop, drop, or hard impact, secure the camera again and begin a new scan.
- Work when few people are present, and keep chairs, tables, displays, doors, and other movable objects in the same positions for the entire scan. Pause furniture moves, layout changes, and cleaning work. Outdoors, avoid rain, snow, fog, and times when direct sun and deep shadow appear together.
- If you plan to use Map Configurator, measure GCP coordinates and any optional Scale Bar lengths in advance, using meters throughout.
Plan a scan route with loop closure
For a large site, mark every area the end user may actually enter on a floor plan or CAD drawing, then draw the main route, branches, and loops. Adjust for real barriers on site, but keep every revised branch continuously overlapping the main route.
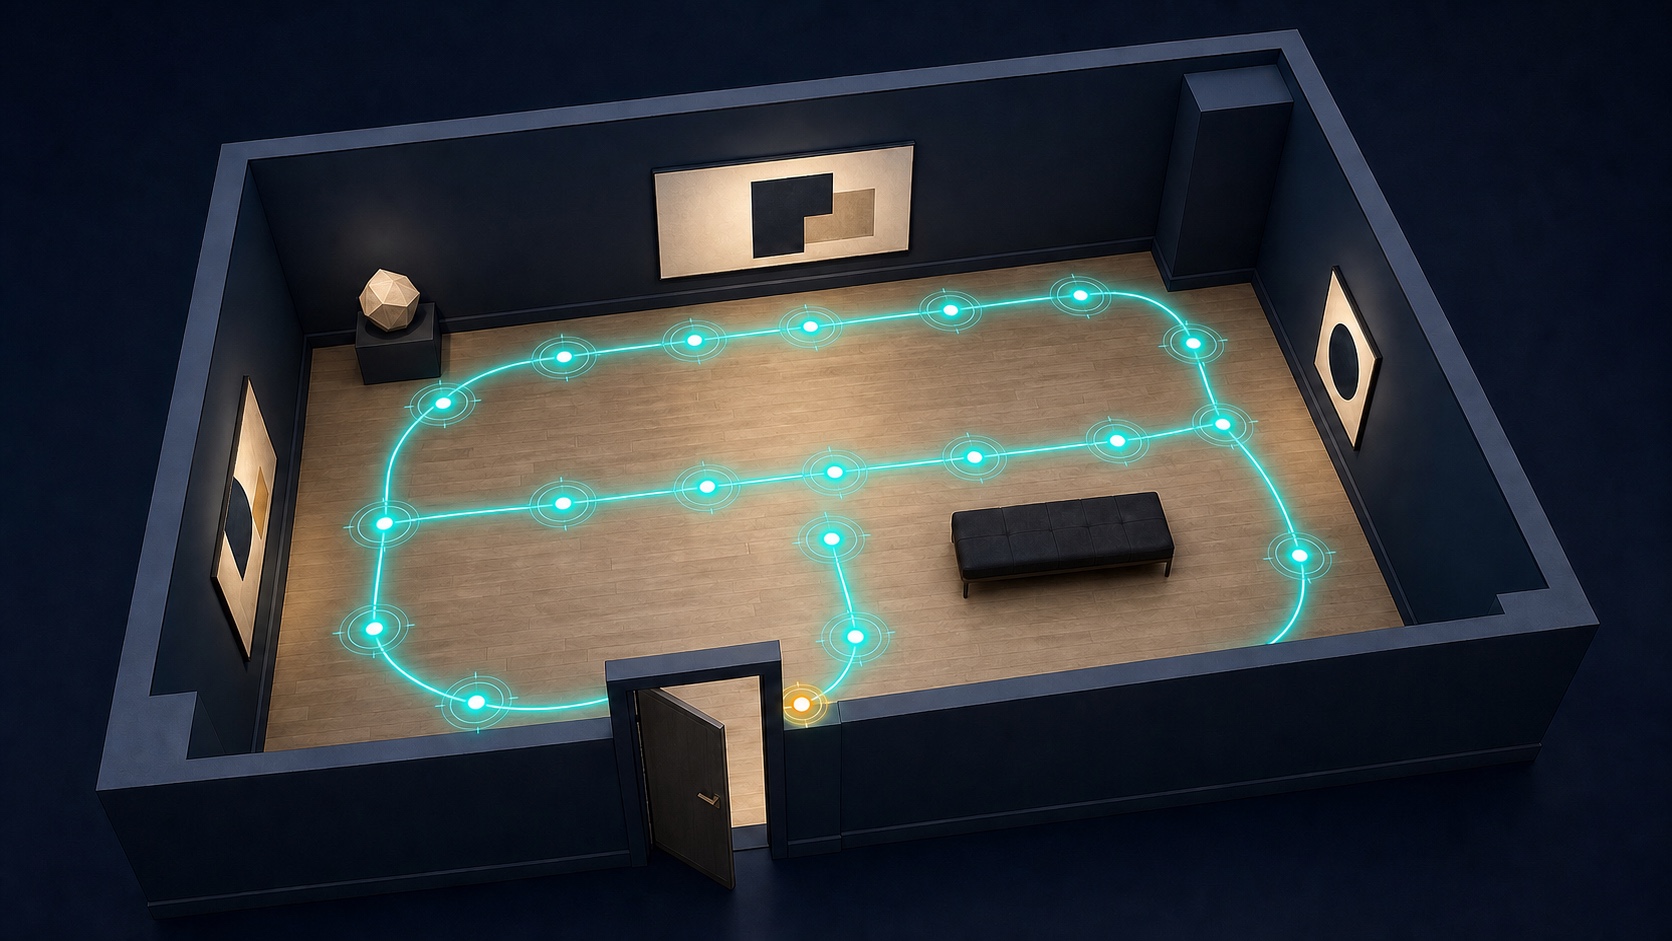
Small room
Walk around the perimeter, then cross the interior and finish near the starting position. Do not only rotate from the center of the room.
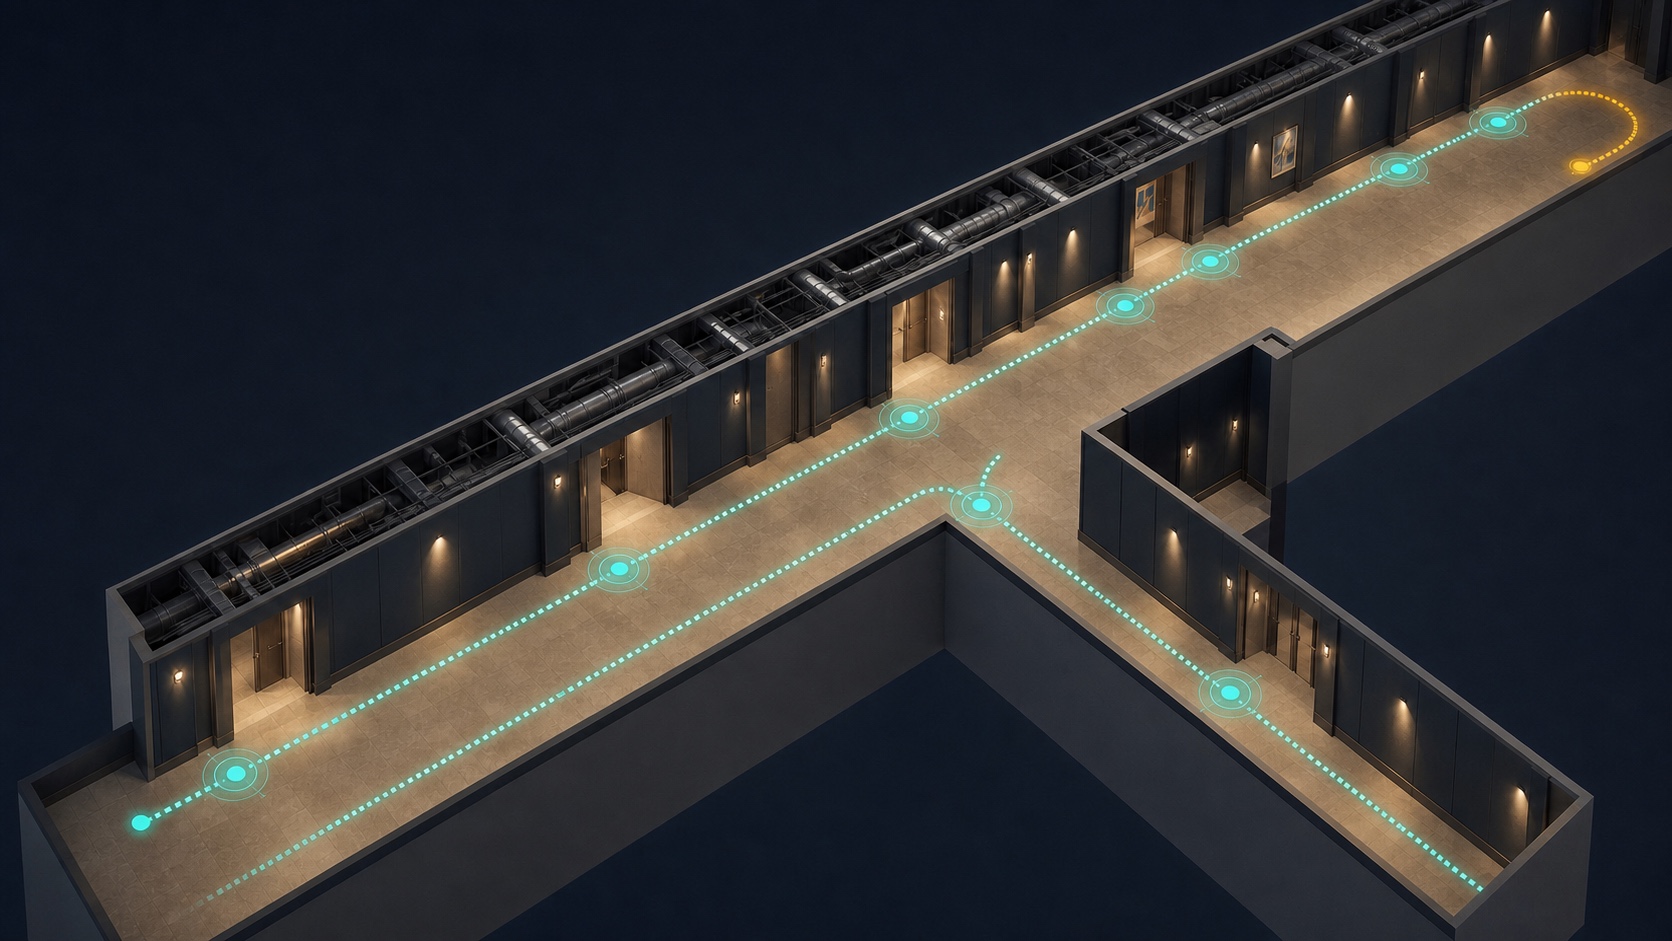
Long corridor
Walk to the end and return along the opposite side. Slow at doors, corners, and junctions so each transition appears on both legs.
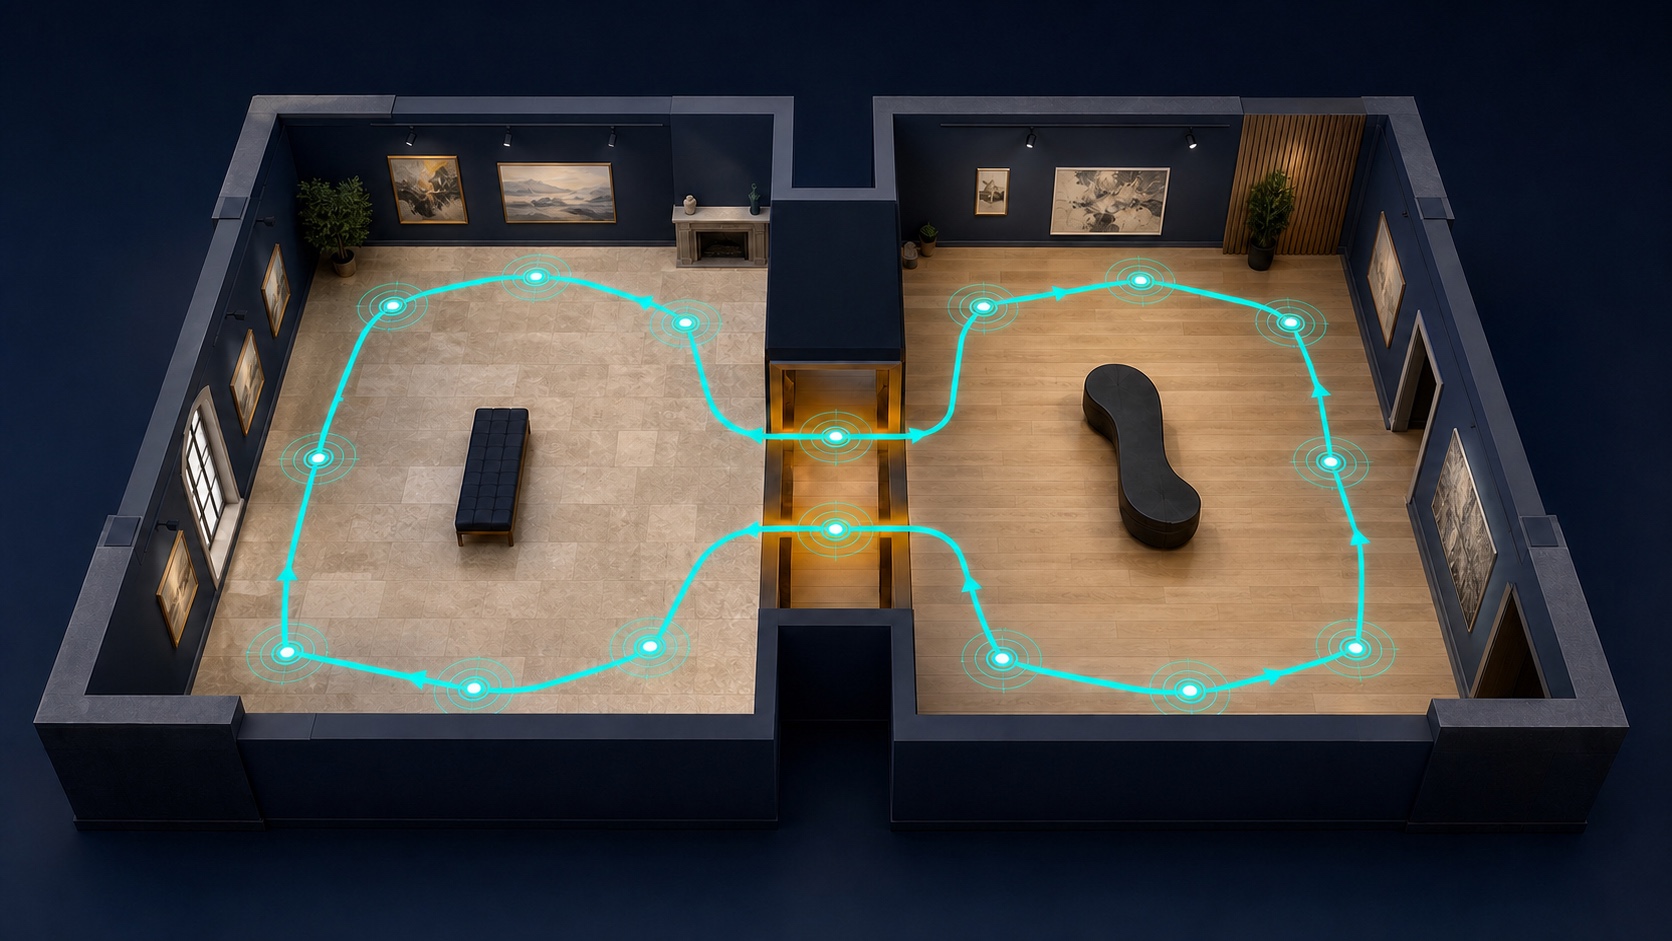
Connected rooms
Make a small loop in every room and cross each connecting doorway at least twice. Door frames, fixed signs, and wall corners are useful cross-area observations.
Large open area
Complete the perimeter first, then traverse the interior with connected passes. In a textured space captured at 8K, keep neighboring passes roughly 4–6 meters apart; reduce the spacing for 5.7K, low light, or weak texture. Every interior pass must overlap the perimeter or another pass.
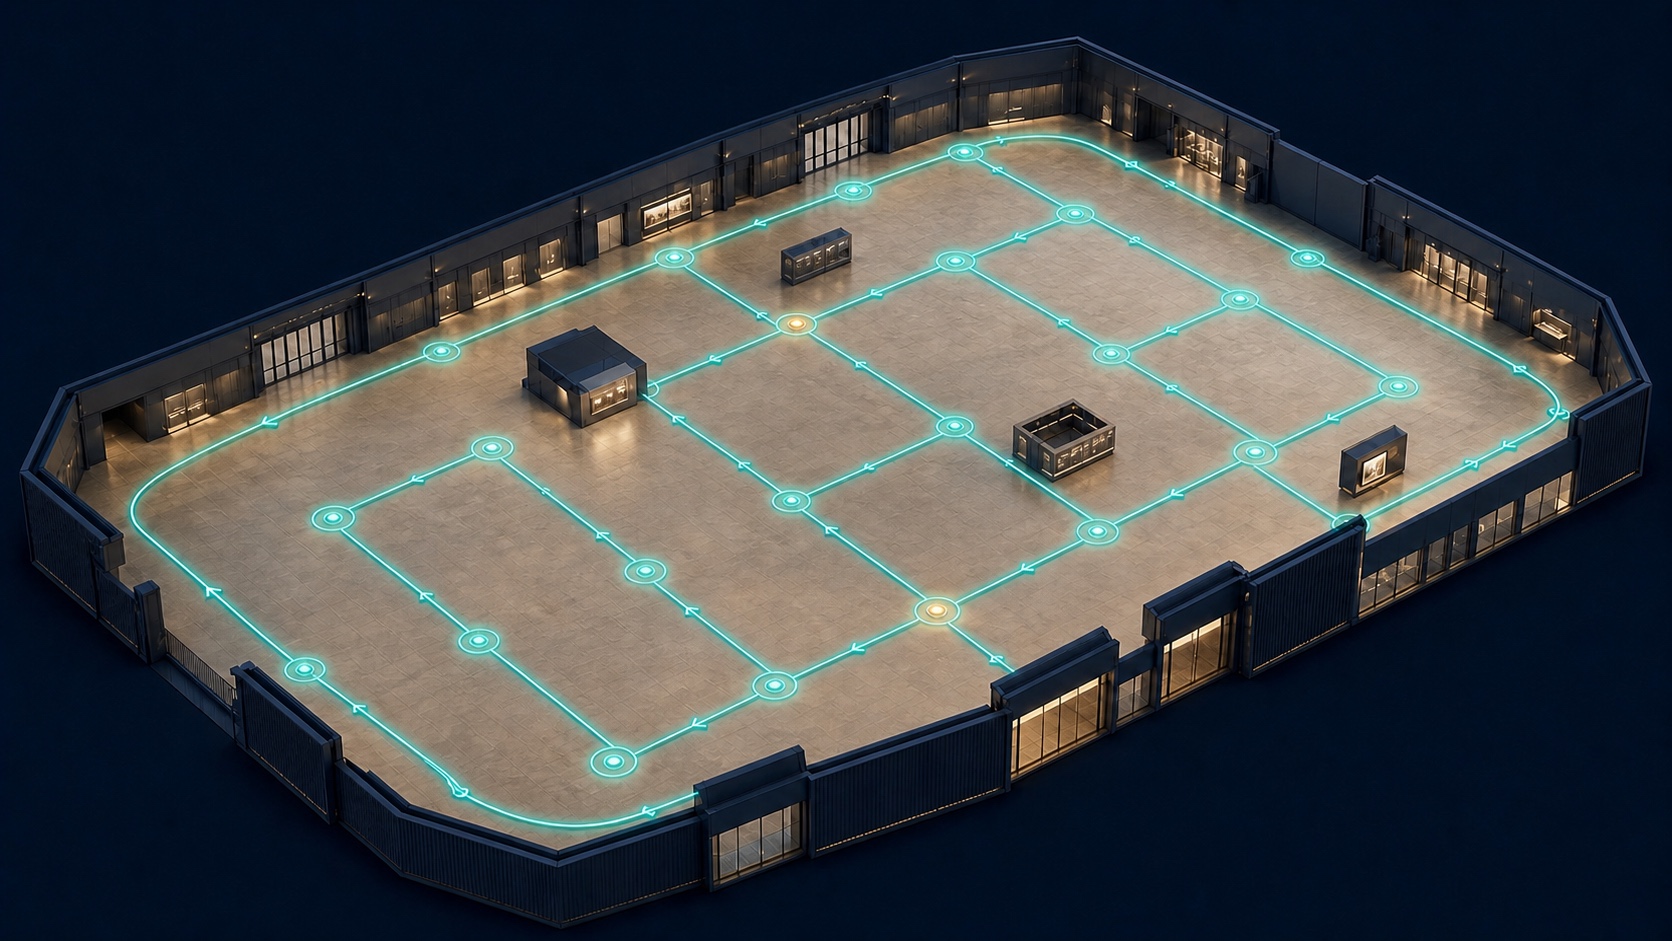
Very large or multi-floor site
If one recording cannot be completed safely within stable power, storage, and lighting conditions, divide the site by floor or functional area. Give every area its own closed loop, preserve substantial overlap in textured transition zones, and scan adjacent areas under similar lighting when possible.
Record the video
- Mount the camera vertically at the top of a monopod, normally about 1.6–1.8 meters above the floor. Lower it for a low ceiling, but keep height stable throughout the route.
- Start near a doorway, corner, sign, or fixed fixture with rich visual detail. Do not start in the center of an empty hall or in front of a blank wall.
- Record while stationary for 2–3 seconds, then move straight for 2–3 meters before entering the planned route.
- Walk continuously at about 0.5–1 meter per second. Slow further through turns and U-turns, follow a wide arc, and never spin quickly in place.
- Slow at doors, corners, weakly textured walls, and area transitions, then revisit them from another direction.
- Do not stop immediately after returning to the start. On a large route, retrace the first 10–30 meters; in a small room, cover another portion around the start.
- Stop moving for 2–3 seconds, end recording, and wait for the camera to finish saving before moving it.
Neighboring moments need both overlap and real translation. Rotating in place reveals many directions but cannot replace a continuous scan route with a useful baseline.
Preserve reliable observations for a spatial reference
Before capture, read Use 01Spatial Reference Boards and choose one method: place one or more boards, or place none and use Map Configurator after parsing. At least one method is required.
The manual configuration route requires at least three GCPs. Select them using three rules:
- Measurable and repeatable: choose wall-floor corners, doorway corners, or tile-grout intersections that cannot move and can be marked precisely in multiple frames.
- Visible from multiple positions: every GCP must appear in at least two different panorama frames.
- Span the 3D space: at least three GCPs must not be collinear. For production, use four to five GCPs with at least four non-coplanar points spanning left/right, low/high, and near/far.
You can also prepare Tie Points at doorways or long-corridor corners where the map could disconnect. A Tie Point needs no measured coordinate; the same static feature only needs to be identifiable from multiple positions.
Export and upload
- Copy every source file from this scan to a computer and retain the originals on the memory card until the map is validated.
- A camera may split a long recording into multiple segments. Use capture time and the vendor's numbering scheme to confirm that every segment is present and that files from another scan are not mixed in.
- Use the vendor's desktop software to stitch the lenses, correct the horizon, and join recording segments.
- Prefer an 8K 2:1 equirectangular MP4 or MOV at source resolution. If the camera cannot record 8K, retain its highest available resolution. Prefer H.264 or H.265 and avoid repeated transcoding.
- Play the entire export and inspect duration, black frames, corruption, seams, blur, and exposure jumps. Confirm that width is approximately twice the height.
- Put this single video in a ZIP. Use one mapping video per ZIP.
- Open Spatial Maps in Portal, enter the target project, and select + New Map. Name the map and select 360 Video.
Choose Normal video for continuous recording; 01Spatial adaptively selects keyframes from visual displacement. Then choose a frame-density profile: Standard for most captures, Dense for fast motion, tight spaces, or weak textures, and Sparse for long, stable, texture-rich routes. Every profile remains motion-adaptive and retains connectivity safeguards; the profile changes the overall number of frames rather than switching to a fixed frame rate. Choose Timelapse only when every recorded frame already represents a separate scan position; all frames are retained. When uncertain, use Normal video with Standard density.
Under Upload from, choose a source:
- Cloud (recommended): upload the ZIP to a supported cloud drive and create a share link for that ZIP file. Select the provider, paste the link, and choose Download from Cloud. The server downloads the file directly, which is preferable for large 8K panorama videos.
- Local: select the ZIP from the computer and keep the page open until upload finishes.
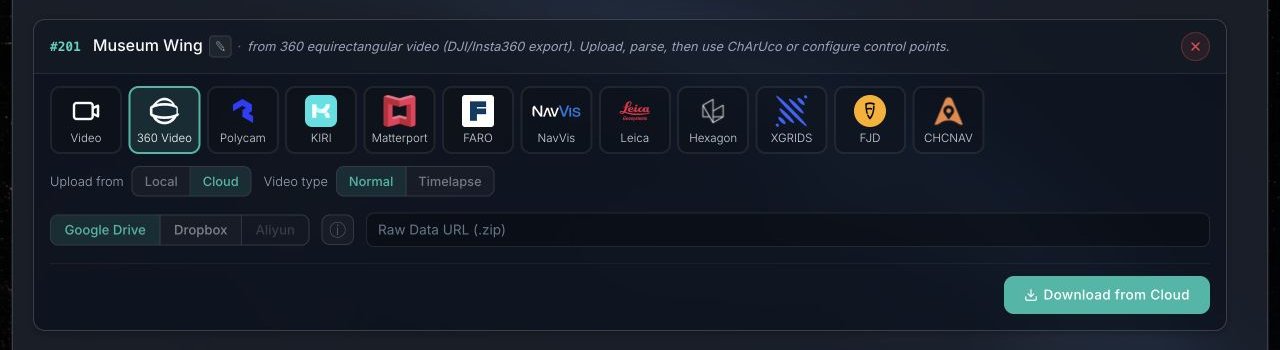
The share link must point to one ZIP file and allow the server to read it. Do not use a folder link, a sign-in-only link, or an ordinary preview URL copied from the browser address bar. Do not remove or replace the cloud source during transfer. Available providers depend on the current Portal environment.
Pre-upload checklist
- The camera used 360° panorama video mode and 8K or its highest available resolution.
- Every lens protector, including transparent protectors, was removed; both lenses were clean and undamaged.
- Power, thermal conditions, card speed, and free space were sufficient for the full route.
- Recording ended and saved normally, without power loss, full storage, thermal shutdown, a drop, or a hard impact.
- Fixed-object edges are sharp, without sustained motion blur, flare, or stitching ghosts.
- All target areas are connected, transitions have repeated coverage, and the finish closes the loop with the start.
- The board or Map Configurator route is selected; the manual route has at least three non-collinear GCP candidates visible from different positions.
- The exported MP4 or MOV is a stitched 2:1 panorama, not raw dual-fisheye footage.
- The ZIP contains one video; source files, the export, and measurement records are backed up.
After upload, Portal parses the video, selects panorama keyframes, and generates a quality report. When the map reaches Parsed, continue to Use 01Spatial Reference Boards and confirm the automatic board or Map Configurator route.