Machine-readable: manifest · index · English Markdown
Draft translation: this English page is available for review and is not yet the production default.
Scan with Polycam
Polycam records both spatial imagery and device motion on a phone or tablet. 01Spatial builds a high-quality visual map from the complete Raw Data package and further refines the recorded camera trajectory. You do not need to configure GCPs manually, and a surface-model file alone is not sufficient.
Use this path for an indoor space captured in Polycam. Object Mode for individual objects, floorplan-only output, and 360 Mode are not inputs for this workflow.
1. Confirm the device and output
Prefer a LiDAR-enabled iPhone or iPad and Space Mode in Polycam. A non-LiDAR device is usable only when Polycam can export complete Raw Data containing both camera images and trajectory for that capture.
The primary 01Spatial input must be a ZIP containing at least:
keyframes/
├── cameras/   # Per-frame camera parameters and poses
└── images/    # Original mapping images
A GLB, OBJ, PLY, or share link cannot replace the Raw Data ZIP because it lacks the complete original frames and per-frame camera information. A GLB may be uploaded separately as an optional model for spatial preview or AR occlusion.
2. Enable Developer Mode before scanning
Polycam must have Developer Mode enabled before capture so complete Raw Data is retained. The setting does not automatically restore missing data for an old scan.
- Open Polycam and go to Profile at the bottom right.
- Select Settings, then enable Developer Mode under General.
- Confirm that the device has enough free storage before starting a new scan.
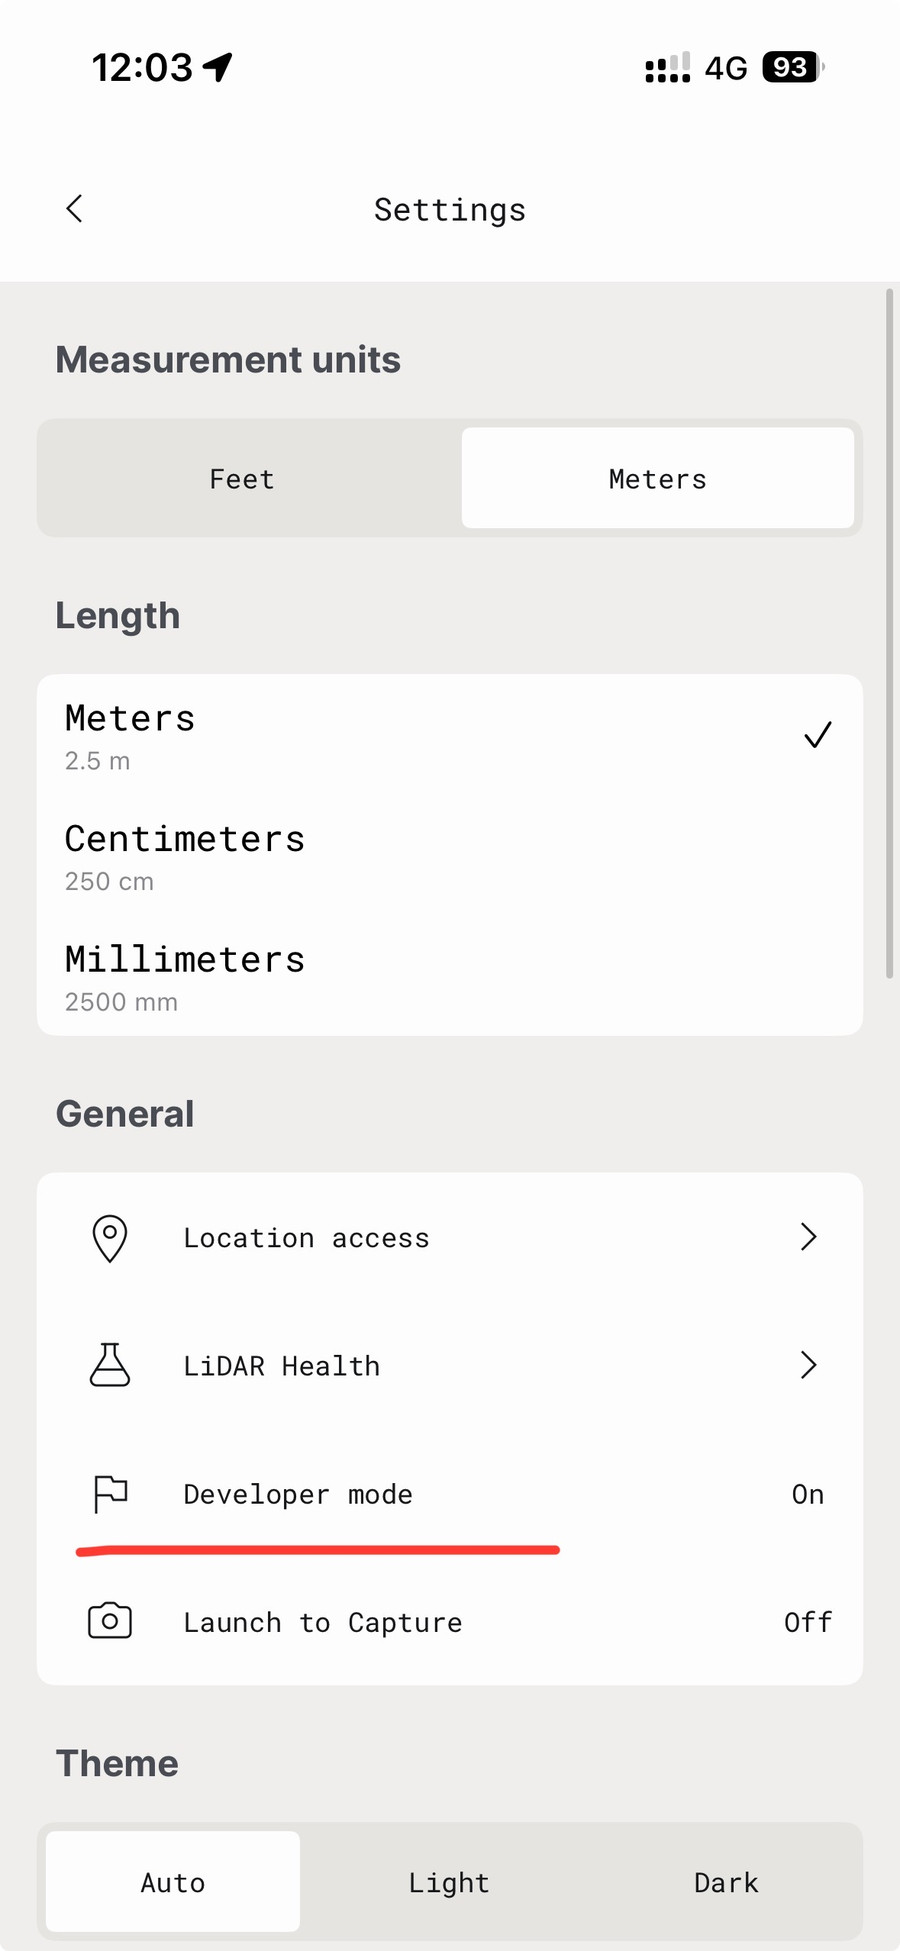
Raw Data for a LiDAR capture normally must be exported from the original capture device. Do not uninstall Polycam, delete the local capture, or clear source data before export.
3. Prepare the space
- Turn on site lighting and avoid a large brightness difference between regions.
- Clean the lens and confirm sufficient battery and free storage.
- Minimize people and movable objects in the view.
- Move temporary objects that block important corners, doors, and fixed fixtures.
- Plan one continuous route through every localization or AR area, returning to a previously seen region to close the loop.
Glass, mirrors, reflective metal, and blank walls provide weak visual evidence. When they cannot be avoided, capture nearby doors, corners, signage, and fixed fixtures from several angles instead of filling the view with the difficult surface.
4. Scan in Space Mode
When creating a scan, select SPACE from the capture types at the bottom. Confirm that SPACE is highlighted in yellow, then tap the central white record button. Do not select 360, OBJECT, FLOORPLAN, or IMAGE for this workflow.
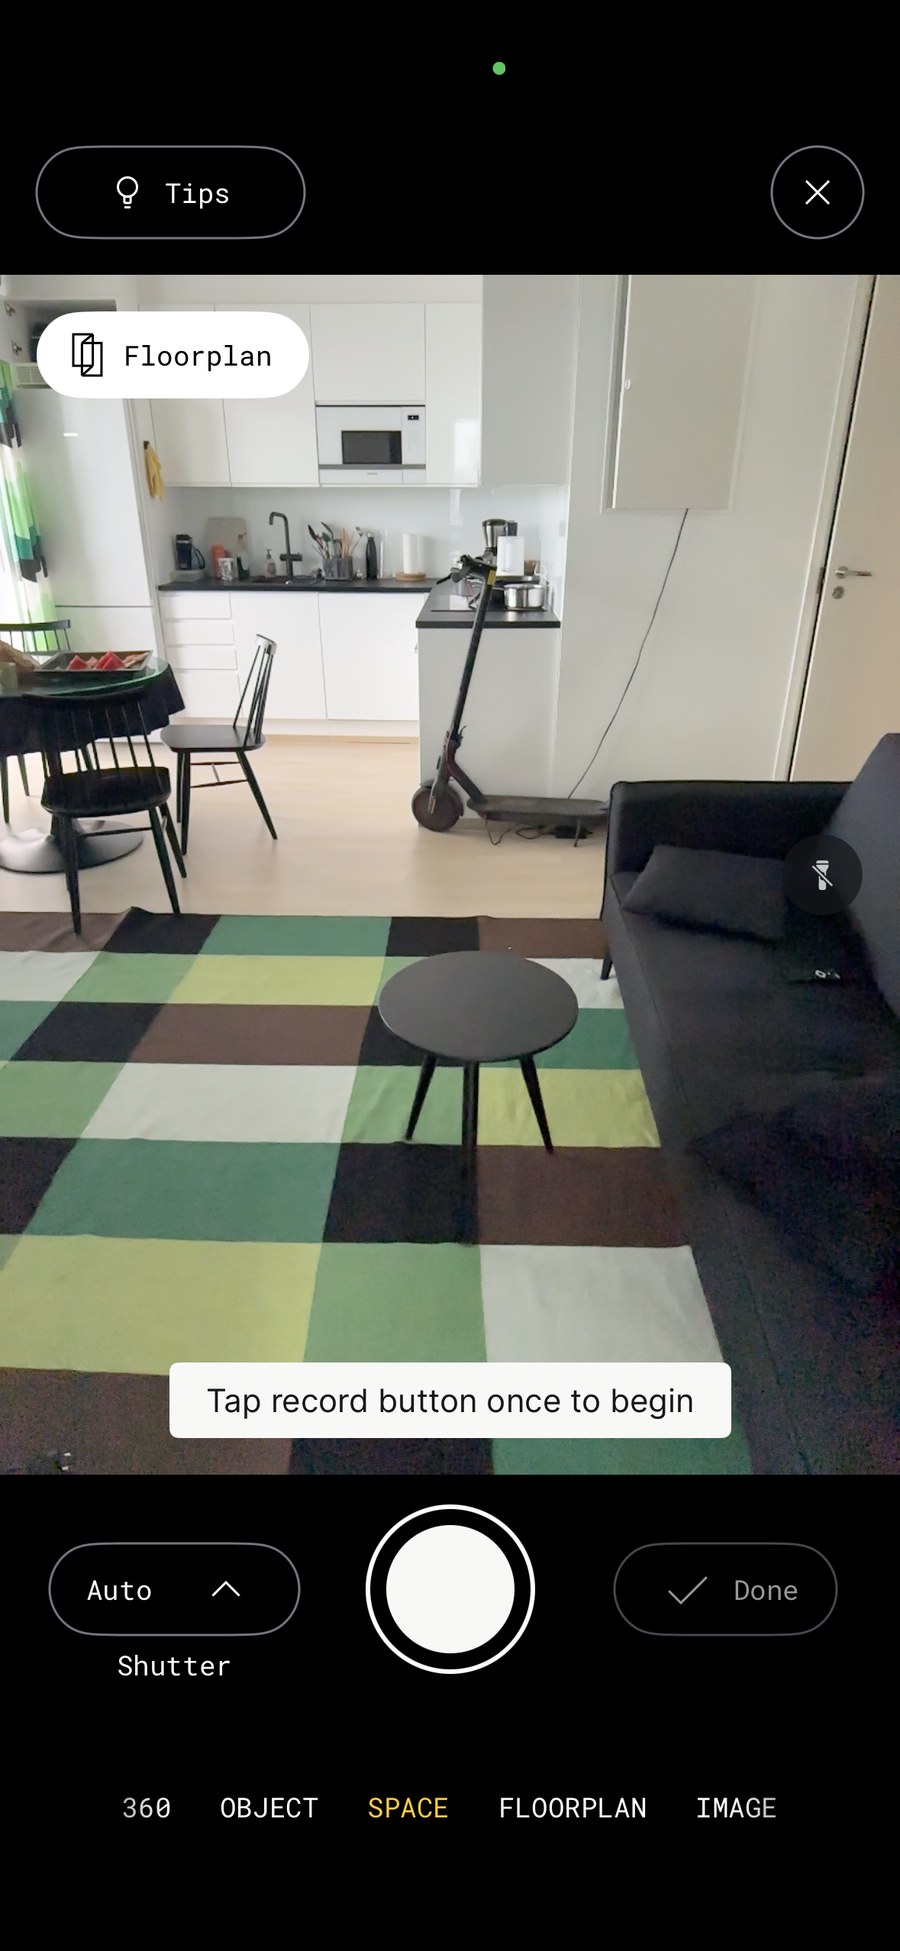
- Pause at the start and slowly observe surrounding corners, floor, and fixed fixtures.
- Move smoothly at a normal pace while keeping substantial shared content between neighboring views.
- Slow down at doors, turns, stairs, and room transitions, observing the connection from both sides.
- When Polycam shows incomplete coverage, capture the corresponding wall and corner deliberately. Do not whip the device around to clear the indicator.
- Revisit the start or another covered region before finishing to create a visual loop.
During capture, Polycam overlays the live camera view with reconstructed surfaces and coverage feedback. Follow one continuous route and deliberately fill gaps on walls, floors, and fixed structures. Use the pause button when you need to stop temporarily, and select Done only after the target space is covered.
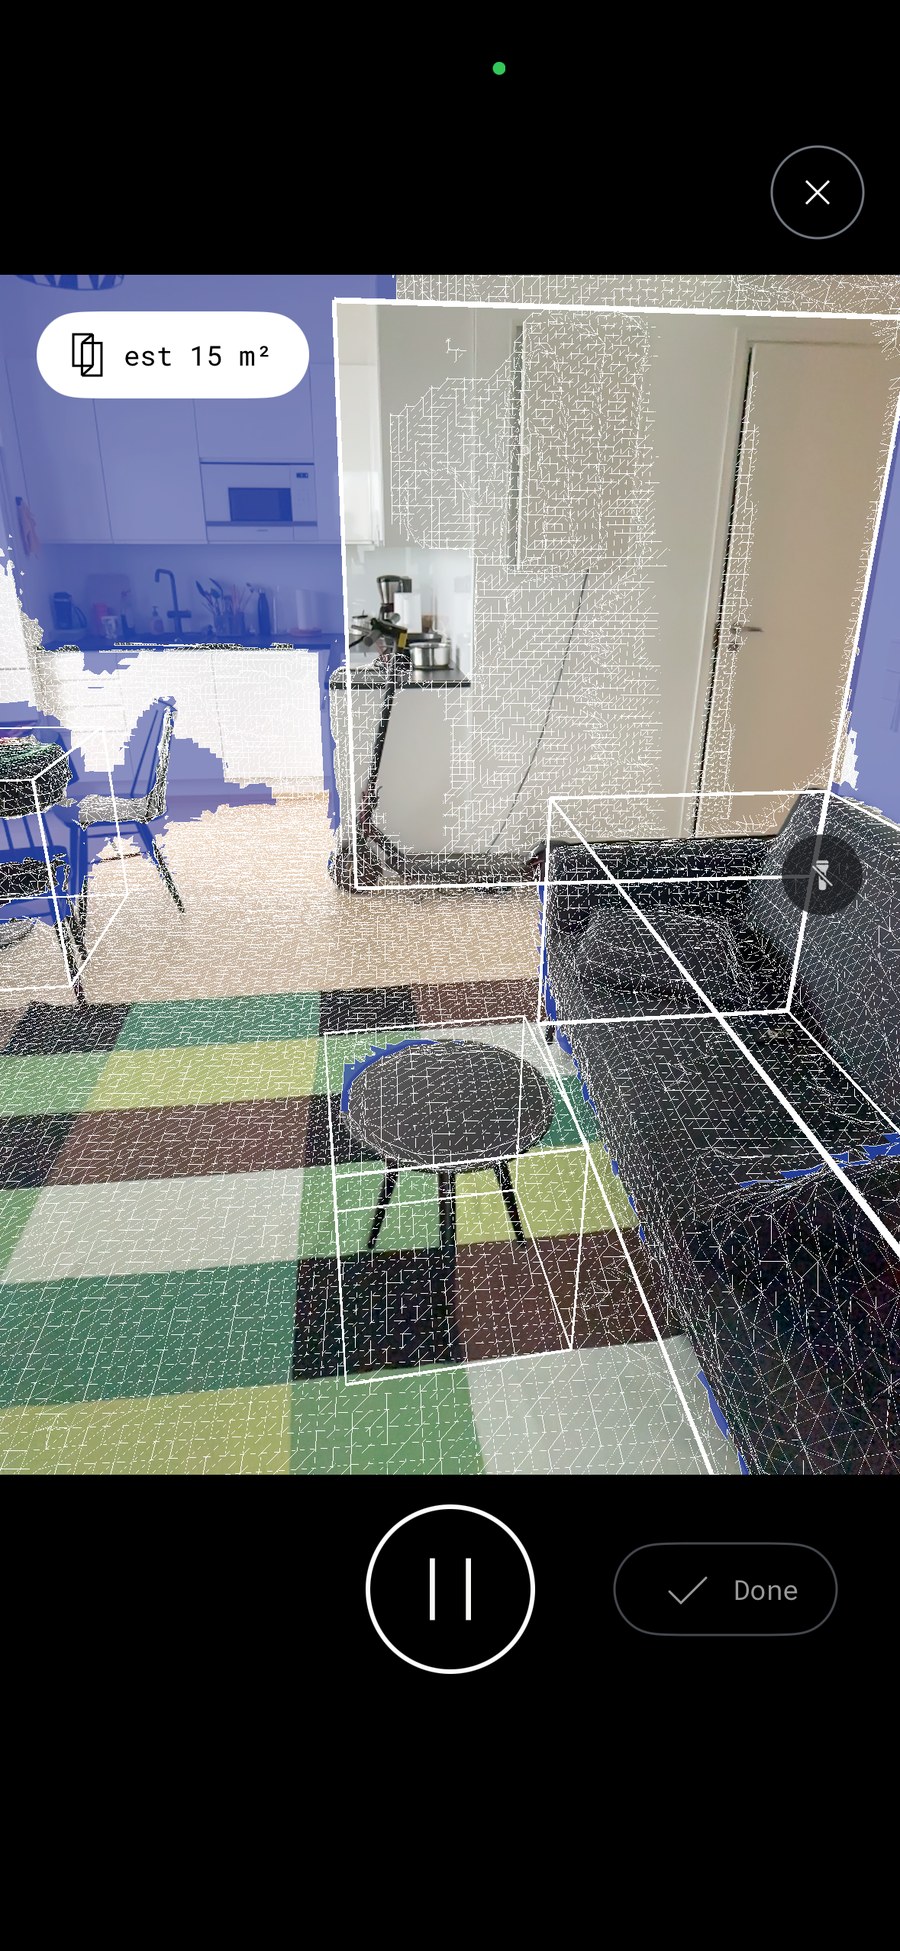
Sharp imagery matters more than speed. Fast rotation, strong shake, a finger over the lens, or prolonged views of moving people reduce final map quality.
Large spaces
Treat a large site as overlapping regions while keeping one continuous scan. Each region should share a clearly visible door, corridor, or fixed structure with the next. Do not stop, move to a disconnected location, and resume.
If the device overheats, tracking fails repeatedly, or the app becomes noticeably slow, finish at a well-covered location. Do not preserve a long scan after its quality has become unreliable merely to complete the whole site in one session.
5. Check before finishing
- Every target room, doorway, turn, and route endpoint is covered.
- Adjacent regions share clear, continuous views.
- There are no long blurred, dark, overexposed, or occluded segments.
- The route returns to a previously scanned region and closes a loop.
- Polycam shows no obvious holes, displaced surfaces, or persistent tracking failure.
Fill a missing area immediately. If tracking has already shifted, continued scanning usually extends the error; restart the scan instead.
6. Export Raw Data
- Open the completed capture on the original capture device.
- Select the export or download arrow.
- Scroll to the bottom of the export options and choose Raw Data.
- Select Export and wait for the ZIP to finish saving.
- Keep the original ZIP. Do not remove
keyframes/cameras, removekeyframes/images, or rearrange its folders.
For AR surface geometry, you may export a GLB separately. The Raw Data ZIP is the primary mapping input; the GLB is optional.
7. Upload to 01Spatial
- Open Spatial Maps in Portal, enter the target project, and select + New Map.
- Name the map and choose Polycam as the input type.
- Under Upload from, choose a source:
- Cloud (recommended): upload the Raw Data ZIP to a supported cloud drive and create a share link for that file. Select the provider and paste the link into Raw Data URL. To include a Mesh, paste a separate ZIP link containing only the GLB into the optional Mesh URL. Choose Download from Cloud so the server can fetch the files directly.
- Local: select the Raw Data ZIP from the computer. If a Mesh is available, also select a separate ZIP containing only the GLB. Keep the page open until upload finishes.
- Wait for input checks to pass. Portal then enters the mapping flow.
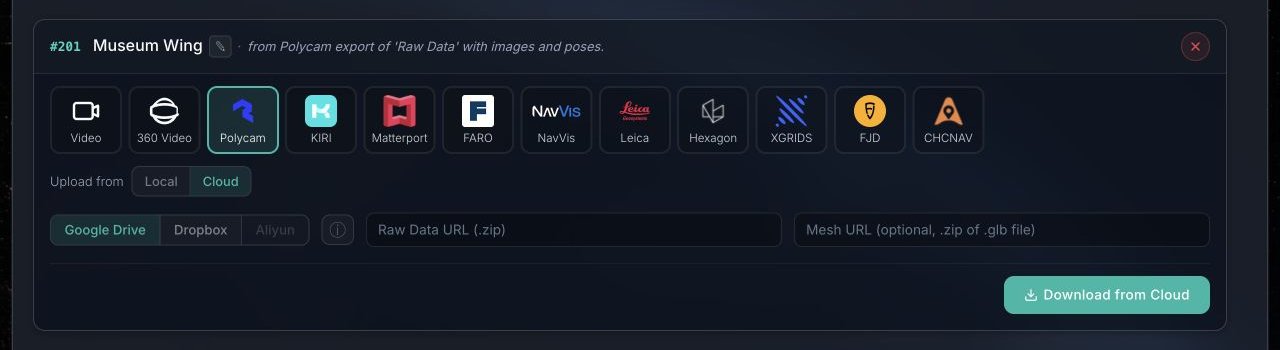
This path uploads a Raw Data ZIP, not a video file. Prefer Cloud for large files. A share link must point to one ZIP file and allow the server to read it. Do not use a folder link, a sign-in-only link, or an ordinary preview URL copied from the browser address bar.
Portal verifies that the ZIP contains both camera files and source images. A GLB-only package, missing cameras, missing images, or a corrupted ZIP is rejected.
Validate after building
When the map is Ready, use Space Studio localization testing near the start, route middle, doors, turns, and endpoint. Test normal device height, expected lighting, and transitions between connected regions.
Keep the Polycam project, Raw Data ZIP, and optional GLB until localization acceptance is complete.